|
|
|---|
This is tricky to get right, but the benefits are enormous.
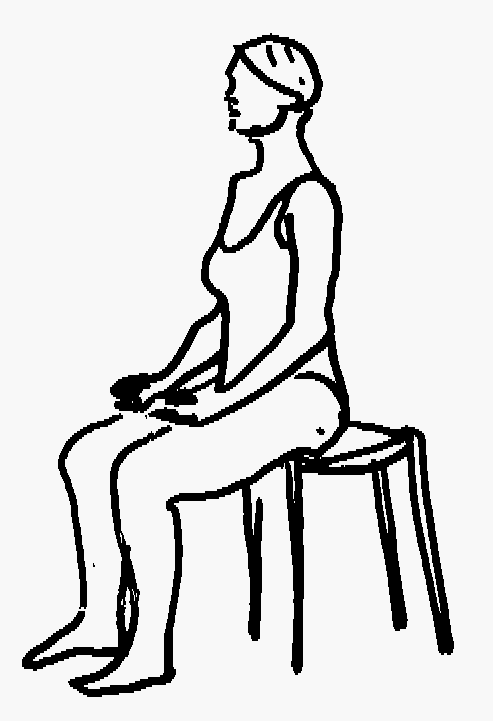
The Pelvic Elevator- Start Position
- Sit upright on a stool or chair.
- Pelvic neutral.
Pelvic Elevator- Action
- Breathe in wide and full and lengthen up through the spine.
- Gently zip and hollow, and hold it. You are now at the ground floor (level 1)
- Breathe out, and then in again
- (Breathing out): Zip and hollow a little harder, and gently draw up the pelvic floor muscles
(The ones that stop you peeing). You are now at the next floor, or level 2!-
- Breathe out, and then in again.
- (Breathing out): Pull your navel hard to your spine
and draw your pelvic floor muscles up firmly,
You are now at the next floor, or level 3!
- Keep the upper abdomen and chest relaxed so that you can still breathe, and breathe for a few breathes!
- And relax!
(pelvic elevator, Scroll right>>>>....)
|
Position for
Pelvic Elevator:-

Watch Points:-
- Try to keep all other muscles relaxed. Especially:-
-
don't grip around the buttocks!
- don't let the Rectus abdominus (the "washboard abs" muscle cut in.
- keep shoulders down!
- Maintain Pelvic Neutral.
- You should be able to beathe easily.
|
What it does:-
- Teaches fine control of the Transversus abdominus.
Comments
- Once you have mastered the pelvic elevator while sitting, try it while lying prone,
while in the relaxation position, and while kneeling on all fours.
- You have now learned to apply a strong "zip and hollow". During most activies,
such as walking, jogging or gardening, take the pelvic elevator only as high as level 1 or level 2.
This will guarantee that the transvsersus abdominis will automatically trigger when required to fulfill its role in
lumbar stability.
- One word of warning! When applying the pelvic elevator at level 1 or 2 through the day, try not to
grip hard under your tail bone - (that "tight assed" feel) - and you cannot
stay relaxed doing that!
Reference
© Bruce Thomson, EasyVigour Project
scroll up^^^^.....
|

